Showing posts with label microbiology. Show all posts

Monday, January 4, 2016

It's All About the Dirt - part 2


The results of the recent soil test are in! In case you missed it, early last month, I sent out a sample of soil to Texas Plant and Soil Labs to get a baseline reading on my soil, which has been quite unproductive following the past 2 winters/springs excessive flooding rains. Read about it here.

I’m pleased to say that the work I did spreading all of those piles and piles of composted tree mulch was helpful. By adding composting mulch by the tractor bucketful, I was successful in raising the OM, organic matter. I think having a 2.2 OM reading is pretty dang good. And so did my advisor. A 2.2 reading on the organic matter chart – isn’t too bad considering my native soil here is sand. 

Officially.

On a scale of 1 – 6, with 3 being loam and 6 being heavy clay, my soil is a 1 – sand.

So, imagine growing your vegetable garden, if you will, in a quarry full of marbles. That’s about what it's like at my farm.

Zero water holding capacity to speak of. And the CEC, (Cat-ion Exchange Capacity, which is a measure of the soil’s ability to hold and release various elements and compounds, namely, nutrients imperative to healthy plant growth.), was pretty low as well. It was estimated at between 3 - 5; potentially estimated a smidgen better because of the better than normal, (for sand), OM reading.

But when 7 of the 12 tested nutrients rate at critically low already, it’s my understanding that, basically, the plants were starving.

If it weren’t for the foliar applications of liquid fish and seaweed, along with compost tea that I put out nearly every week, they may not have made it as long as they had. And no wonder why 2015 will certainly not go down in the books of most production/highest yields.The garden was essentially on life support. Alive, but not thriving by any means.

So, my goal was, and is, to salvage the winter crops, be able to plant some more for early spring, and rebuild the fallow beds for a great warm season crop. This work starts now!

Follow up
I had a few questions for the lab and my adviser, as you may well imagine if you’ve ever stared at one of these soil analysis reports for the first time.  I compiled a list of questions, with the clarifications my adviser wanted to get from the lab as well, and I called in for my courtesy 15 minute follow up session.

There were a few notes on the summary and in the analysis that seemed to contradict each other or increase the amounts of the summary page on the analysis chart, of certain suggested amendments, that I wanted to clear up.

But mainly, I wanted to know how in the world the ultra low PH reading I consistently got in the field with my hand held meter could be so different from the reading they had taken in the lab.

Besides the soil sample being a bit more mixed and inclusive of topsoil that contained bits of active composting mulch, which indeed could affect the PH reading of soil; the hand held meters, I’ve read, are not nearly as reliable as the instruments at a lab which are calibrated regularly and taken under more controlled situations.

I’m told, that a lot of variables can come into play when getting a PH reading and not to lay a lot of merit on it, in and of itself, for decisions I make. So now I am not sure if I can grow blueberries out here or not, like I thought I could. Guess I’ll still have to just do a test row and see what I get. But I'm doubly glad I didn't do what many were encouraging me to do and that is to dump a bunch of lime on my soil! What a mess I could have created!! 

I also wanted to know what the heck I was going to do to raise the Cu (Copper) reading that suggested a pretty serious deficit – spread out a bucket of pennies in the soil? No, he suggested a light application of a product called Azomite.

I’d heard of this product before from some of my colleagues, but thus far had not tried it. Here was my chance. If you follow the above link, you’ll find it contains all sorts of trace elements – some of which my soil was low on anyway. 

Being low on salts, another nutrient measured, was actually a relief to me because I knew using horse stall waste could potentially raise salts due to the urine in the bedding I would add to the compost for the benefit of N, plus the bacteria it would contain and help develop. Our horses here are only stalled at night though, so much of the soil and wood shavings are drier than perhaps from places where horses are not turned out for the majority of the day. Plus, our horses stand on soil, not cement covered with wood shavings, so I imagine some of the salts are broken down naturally in the soil of their stalls before it’s ever removed and added to compost piles.

Humate was another low reading and the suggested application was 150lb/acre. Also, I could use either dry molasses or a liquid form at 3-5lbs/acre or a qt/acre respectively to boost things in general.

Sulfur plays a couple of roles in our soils. Namely it aids in the uptake and availability of Phosphate, the P on our fertilizer bags, and something my soil showed an abundance of, but it also helps improve the tilth of the soil as well as activating the Ca and Mg by “solubilizing them to the available water soluble form”. I’m not exactly sure what that means it does literally – but it sounds pretty important! So, of course using a dry, dusting – water soluble – form of sulfur, means it can be laid out in the trenches with P or without, if there's enough already in the soil, whenever planting.

As I mentioned, my soil tested adequate for P, so no additional bone meal or soft rock phosphate was suggested at this time – especially for winter, non-blooming, crops like lettuces, kale, and turnips, etc.

Potash, the K of the big 3, was also critically low. And it’s said (on this report anyway), that at least as much K is needed to grow healthy plants as N. Deep rooted plants will “mine the subsoils” to find K, but it is not something easily replaced without, I assume, planting deeply rooted cover crops, mowing them down, and then turning them back into the soil. I do this each winter, however apparently not enough had been mined and returned, or retained, to get a healthy reading. Plus, many winter vegetable crops don’t really develop a very deep root system.

Last, but in organic farming certainly not the least on the list of suggested additions, was activators, in the way of soil inoculates. These are generally what we find in freshly brewed and properly made compost teas, or, Worm Wine™. Here’s what the founder and owner of Texas Worm Ranch, Heather, has to say on the subject.

Fungal hyphae a necessary component of healthy soil, cannot survive well in wet/anaerobic conditions such as those described at your farm. The sandy profile also reduces opportunity for fungal hyphae--without humus and lignin in high quantities, (fungal hyphae) can't establish. Without aerobic soil microbes, fertilizer has a hard time converting to plant available nutrients. Anaerobic conditions (flooding) will reduce soil PH and result in ionic changes in soil mineral interactions that reduce plant available nutrients.

So Heather's approach would basically be to forgo adding nutrients and only add more organic matter and inoculates, be sure all of the soil is mulched, plant mixed rows of vegetables, instead of mono-culture beds, and put perennials in between my plantings for erosion control, and continue many of the measures I already have in place; over-seeding with legumes, using worm castings and minimal inputs (fertilizers). She also wanted me to use
"aerobically aerated finished compost or fungally dense worm casting tea" - such as the Worm Wine™ - giving Nature time to get in there, roll her sleeves up and restore things to balanced on her own.

The only problem being - I don't have the months this could take for that to happen if I am going to continue feeding myself and my CSA, as well as be ready for a warm season harvest. Some of the components are in place including compost that was made using decomposing leaves as well as horse stall waste and the mulched tree trimmings, so we will be testing these rows without amendments, other than those suggested by Heather, just to see how long it would take to restore the healthy yields of years' past.

But in order to take advantage of the predicted rains, which would help begin the breaking down process of the amendments recommended by the lab and my adviser, I knew I needed to get these suggested amendments out as soon as possible. I wasn't going to be able to produce 137lbs of N and K per acre for spring, simply by planting cover crops. And even though my organic matter rating was decent, the dismal fall harvest made it clear more that what I was doing was needed.

So, I spent the 23rd running around, not last minute gift shopping like many, but garden soil amendment shopping. I found everything I needed through my normal wholesale supplier, except a sufficient amount of dry humate. I’d need to apply the balance of this when it came in to the warehouse. Even my favorite go-to garden section in town was all but out of it. I picked up 1 of the last 2 small garden sized bags that Gecko had and would stretch it as far as I could.

The Drawing Board
I drew out and labeled the beds of my 4 sections so I could take good notes as to how much of what I was putting out in each bed. I wanted to be able to compare a few rows of no amendments, or “control” as it’s officially called; 2 with no amendments but using the Texas Worm Ranch’s Worm Wine™; and the rest with the amendments as prescribed along with my normal routine of foliar feeding and bi-weekly N application as I saw necessary based on observation.  Except where I was unable to secure enough humate, all of the amendments would be applied as prescribed.

Then came the task that challenges so many of us; converting x number of pounds per acre of said amendments, into the amount needed on my beds. I wasn’t going to spread these nutrients on the soon to be permanent foot paths, or on entire acres. So I was about to spend the morning of the 24th, calculating square footage and rates of nutrients per lb of this and that.....

I’ve been called a lot of things in my life, but a math wizard was not ever one of them. I figured out each bed was roughly 300 sq. ft., give or take a few feet. And to make things faster, I found THIS cool fertilizer converter on a website from the University of Georgia. Woo hoo! It took me less time to figure out how to use this on-line calculator than it would have for me to figure out all of the conversions for each amendment on paper. 

So, after recharging my brain with some lunch, I loaded up the bucket on my tractor with my scale, a bucket, and a couple hundred of pounds of N, P, K, humate, dry molasses, sulfur and Azomite, strapped a wheel barrow to the back of the tractor and headed out to the field. I was a woman with a mission!! Where's my cape?

In the wheelbarrow, after weighing them out, I mixed up the prescribed quantity of each of the raw materials for single beds, again, noting the quantities I was adding on the diagram of my 4 sections where I also had noted what, if anything, was currently planted. And trying to grow. On life support of foliar liquid fish feedings into a still pretty well saturated soil.

I hand spread the materials over the hungry beds of awaiting soil biology, like chicken scratch being tossed to hungry hens. On the fallow rows, I went over beds very lightly on the tractor with the disk to make sure things didn’t simply wash away in the predicted rains that were on the way. Some moisture is helpful to begin the process of breaking down the crystallized K-mag and Azomite, as well as the other materials, but too much rain at once, and I was afraid they’d just float over the edge of the beds if I didn’t somewhat incorporate them into the soil. Whereas some organic soil amendments are not water soluble, like many synthetic chemical additives are, too much water can still wash away much of the benefit. Besides, the roots aren’t growing on the surface of the soil, and the microorganisms don’t live up there, either.

The next day I finished amending the rows where crops were planted and gently hand-raked the beds to mix the ingredients into the topsoil. Hoping they’d get a kick start from the soil treat, I decided to leave intact, several rows pre-planted with winter crops. The rest of the beds and any empty areas were hand-seeded with Austrian Winter Peas. These beds did not receive the N amendment either. As a legume, the peas should add some nitrogen to the soil via the miraculous ability to secure it from the atmosphere and store it on their roots.The rest of the prescribed amount would be added at planting time.

As we all know, the predicted rains did indeed come. With a fury of tornadoes that many would like to have never witnessed, I might add. All told, from the time I put out the soil amendments until the storms passed, about 5 inches of rain fell here at the farm.

That’s quite a bit of moisture to get all at once. After discussing the situation with a couple of other farmers, we’re in agreement that it’s not a bad idea to go ahead and reapply a couple of the raw materials like the dusting sulfur and molasses. As we sweet girls know, sugar does, after all, melt in the rain. ;)

The nitrogen source I used is supposed to be water insoluble, but the directions from the lab were to not apply all of it at the same time anyway, so each week or so, I plan to put out some of the recommended rate until the full amount is reached for the growing season. I’ll add some more of it this week when I do my regular foliar application and as I put a few more transplants out. Rain is predicted for Wednesday night into Thursday morning again, but presently, less than an inch is expected.

So, all in all, thus far, that’s where things are in the soil saga. Amendments are out, and if the sun would come out to play for more than a couple of hours a day each week, we might actually start to see some improvements.

Heather will be coming over later this week to access the needs for the 2 beds she’s going to be tending and we’ll keep everyone up to date on the progress as time passes.

In the meantime, I'm starting more seeds in trays/flats for later transplanting and ordering seeds for the warm season. I'm anxious to get things back on track!

Eat Your Food - Naturally!

Marie 
As a sign of hope to those who had tree damage - this beauty of a post oak was among the many here at Eden's that had parts of it twisted off by a 2008 spring tornado. They are resilient and I hope that hope is restored to those so terribly affected by the recent storms that ripped through so much of North Texas. 

Sunday, December 13, 2015

It's All About the Dirt


Unless you are growing in hydroponic or aquaponic systems, it’s the heart and soul of your farm. Soil.

So in honor of World Soil Day - December 5th, 2015, the next few blog posts will chronicle the story of the soil here on the farm and its recent journey from leached out water logged to restored. 

In this 2015 International Year of Soil, the soil here at Eden’s has taken a bit of a beating. 

With over 50 inches of rain, nearly 30 of it in just a couple of months late winter and early spring, the constant, heavy, flooding downpours not only kept us from planting what we wanted, but leaching of the nutrients in the soil had apparently become an issue beyond what I estimated and yields were low - very low. 

Leaching is something I have dealt with somewhat before. I had simply added more organic fertilizers to the compost mix those years, beefed up the frequency of foliar feeding and things seemed to perform adequately. 

I know, my CSA and market customers know, my chef friends know – we’d all seen it with our eyes and tasted it with our mouths; this farm produces wonderful and bountiful yields! 

I was doing things pretty much the same. Organic matter was being added back in each year, slowly, as the mulch and leaves broke down and manure aged, at the very least in the troughs where the plants were growing. And, I still used pretty  much the same fertilizer schedule as in past years. What had changed?

Rain. And lots of it.

I thought I was going to be able to start moving organic matter onto the rows on a much thicker, faster and more efficient basis with the new loader over the winter. However, my tractor – can’t cross water – no, inflatable wings didn't come with the loader. I need a Bat-motractor from Gotham City.

Nor can it keep from getting stuck in what amounts to quicksand when things are really wet out there. The utility company gave me a complimentary 2' rut at my gate during one of their service calls last winter, making it nearly impossible to get out to the field with the tractor - to farm or to improve the rut - until the soil was much drier. And we just were not getting enough dry days in-between the deluges.

This meant a bit of a delay in moving compost out as fast as I wanted. Heck I couldn’t even prepare soil to plant potatoes, much less drive around with bucket loads full of mulch. Trust me – I tried. Ahem. Don’t ask.

Many of the summer crops had been planted, in-between monsoons, in rows I managed to get prepared by hand, but seemed to be failing miserably or yielding very low and not always good looking veggies.

Of the few rows prepped with the tractor, before the spring rains, things were noticeably better. I got a great melon crop out of just a few rows this year.

But the vast majority of crops performed poorly, with low yields. I knew something was wrong. 

The rest of the rows were composted with the tractor's loader, and fertilized during the "flash-drought" as it was dubbed by some. By late October, the soil was re-saturated and transplanting and direct seeding for late fall and early winter crops began. Finally!

But then in a few weeks I noticed that seeds that had been direct sown would germinate, and stop at their cotyledons leaves.

Plugs that I’d bumped up into larger pots for another farmer, were double the size of any transplants from the same batches out in the garden – the ones that had actually survived.

I took a PH meter to the soil to see if something had changed. It was registering much lower than the prior year. When I say low, I am talking LOW – like almost 5.0 and as low as 4.5 in unamended areas.

Last year after the rainy spring season we'd had, it was right at about 5.0 and a just a little higher in most test areas, and then I had been halfheartedly considering planting a field of pick your own blueberries and calling it a day. Now, with the PH even lower – I was nearly kicking myself for not having done it for real!

But I felt this was certainly indicative of something being wrong. Out of balance. With that drop of  PH, certainly other things were lacking, too.

I’d added extra nitrogen to compensate for any of the compost that might still be “active’. I’d added various basic soil amendments like I’d done the first several years – and each year for the first 4 or 5 years, the yields increased as the soil got healthier.

Then in year 6, and in year 7, 2014, I first noticed some things, like tomatoes, losing ground. I took a PH reading to find it had dropped to the 5.0 reading, down half a % from the time I had taken it a few years prior – when things were doing pretty darn well.

I started reading how excessive rain can cause a drop in the PH levels, causing the soil, specifically sandy soils, to become acidic and wreak havoc on the nutrients.

There are some “quick fixes” you can find at just about any East TX feed store; “fixes” that can end up making a total nutritional mess of the soil.

And then there were the long term fixes. I had opted for the latter. That is where the need for last year’s fund raiser for the loader came from. 

I knew if I added compost and got the biology back in the soil with the use of home brewed aerated compost teas and Texas Worm Ranch's Worm WineTM, it would build up the soil, and the micro-organisms, bacteria and fungi. In good time Nature would repair itself, as I continued this cycle towards the goal of a closed loop system.

I guess I was 2 years late to the fix. The compost hadn't been added until after the soils had been stripped of just about everything useful, leaving me with a lot of sand and a little red clay. I needed results - now.

Had the gardens been fully amended with the decomposed mulch before the first monsoon spring in 2014, much less enduring another record season of winter/spring rains in 2015, perhaps things wouldn’t have become quite as depleted as they are now.

Or was there something else going on?

I called our ag extension office here in Dallas County to see if they could offer some kind of guidance. Maybe there had been something really strange grown, or dumped, here over 100 years ago or something that had some mysterious affect on the soil. I didn’t know? I just knew that everything I’d been doing, following the advice of my mentors, was not working any more.

Unfortunately, I wasn’t really offered any help and in fact was told that “we don’t have anyone here that can help you on that scale.” No offer was made to take my name and number and have an extension agent who could help me, call me back at another time.

Frustrated, and standing out in my dying field, I just hung up and nearly cried. 

How could I have worked so hard all this time to have nothing but native "weeds" like henbit, purslane, lamb's quarter, pigweed and Bermuda, pencil and prickly pear cactus and mesquite trees – oh, and the asparagus – surviving? 

A colleague of mine who practices bio-dynamic farming, as well as organic and sustainable methods, was taking a break from growing, so he could, you know, actually make a living. But he agreed to take my case as a consultant and help me remotely from Houston.

He had experienced a very similar situation on another farm just a few years ago. In fact, the soil lab had sent a hand written note back with their soil test declaring it the worst soil they’d ever tested. It too, was very sandy and depleted. Little to almost no organic matter, too. I hoped that at least I had that advantage, with all of the compost I'd spent the last half of the summer spreading out there.  At least the top soil had some OM in it. I was beginning to feel a sense of hope again.

He knew it would need a big boost in the arm of various raw materials and amendments to help the current crops and act as a temporary bridge until Nature and the Worm Wine could do the rest. And this calculating of all of these test results and minerals, etc., is unchartered territory for me. I knew I'd need some help.

I've always gardened based on how the plants react and what the soil needed based on experience. Not soil tests. I’d been taught to “read weeds” by one of my first farm mentors, and a cool book by Charles Waters, in order to know what amendments to add – and so far, mostly it was N and OM that I needed - and it had worked for many years. But it seemed two seasons of excessive flooding rainwater had begun to undo everything I'd done thus far. 


So, I’ve taken soil samples from the aprox. 3 acres currently under production and
 mixed them together and
sent them off to Texas Plant and Soil Labs for testing. I hope I don’t get any sarcastic hand written notes back with my results. LOL

To be continued…..


PS - Heather has a few classes coming up soon at her Worm Ranch in Dallas. Check it out.


Marie


Eat Your Food - Naturally!

Sunday, January 4, 2015

Back to the Ground - Part II


Last post I mentioned that I’d share some gardening tips with you. Since I started gardening back in the 80’s, a lot of new things have come to market, but for organic gardening, it’s pretty much the same story – feed the soil. But what if you are starting from scratch – in other words, starting from a lawn - how do you get started?

I wish I’d learned about permaculture a long time ago because my farm, and previous yards, would look a lot different. But, we learn and implement what we do as information becomes available to us and from that, we often grow. In this case, literally!

So I’m going to share with you a bit of a modified version of how I used to suggest starting a garden from an existing lawn area. And this is true even if you just have an overgrown patch of weeds, too. But many reading this are converting lawns to gardens – and YAY for that!

I generally start out my gardening classes with the disclaimer that my way is by far not the only way and that I don’t hold all of the answers. 

Much of what I have learned and apply today, was learned by listening to others who have much more wisdom and experience than me. I always try to remember my sources to give credit, too. That way you can look up more information or clarify something I’ve said. 

In this case, the method I’m going to share with you is part of a permaculture technique called “Sheet Mulching”. This technique has been called a variety of things and is taught by many others in various forms, including brilliant homesteader and wonderful gardener and author Ruth Stout who wrote How to Have a Green Thumb Without an Aching Back.

Toby Hemenway is the author of an awesome book called Gaia’s Garden. If you’ve not ever read it, I’d really suggest picking up a copy. It’s a great resource guide that I was told about while taking a permaculture class given by Larry Korn, who studied under another great teacher, farmer and author of yet another great book, called One Straw Revolution, Masanobu Fukuoka. So what I’m going to share with you, is nothing new, but it’s certainly revolutionized many people’s gardening attempts, and it seems permaculture is making a broader appearance lately. 

Step 1, in my opinion, is to start small. Seriously. Once you get an idea of how much time the upkeep will take you for the size plot you start with, you can gauge whether or not you’d like to increase the size the following season. But let's not bite off a huge chunk and let it get away from us the first season. It's not really difficult to grow some of your own food, but it will take some time.

Plot location is as important as plot size in that you need to have at least 4-6 hours of (preferably) morning sun. Afternoon sun really doesn’t benefit growth as much do the sun’s rays during the early part of the day. There are some plants that can grow without much sun, and if you’re patient, you can still have a garden with only 4 hours of morning sun. But let’s hope you can find a corner or plot somewhere with a bit more than that. 

So, now let's say we’ve selected a nice, manageable slice of land that gets at least 4 hours of sun.
Here’s the abridged directions of what Toby calls the “Ultimate, Bomb-Proof Sheet Mulch”;

I would change one thing around, just to make it a bit easier, and that is to mow grass/weeds low before you start, rather than after his step 1, as he outlines in his book. Leave the clippings on the ground.

  • Water area to be prepared the day before – or better yet, plan to do this the day after a good, soaking rain.
  • Add any soil amendments needed for your soil type. Such items would include, lava sand, rock phosphate, perhaps some kelp meal. We’ve discussed soil amendments a few times before (or you can check the web site for more info.)
  • Loosen heavy clay, using a garden fork. You are not digging or turning the soil. Just push the garden fork in and rock it back and forth a bit, all around the site. This adds air to the soil and allows amendments to soak in faster as well as give soil critters some wiggle room. 
  • Add a thin layer of a source of nitrogen. You can use a general organic fertilizer like Texas Tea or Lady Bug, cottonseed meal, feather meal or even some decomposed farm animal manure. Horse and chicken manure is in abundance here, so that’s generally what I use.
  • Layer with several sheets of newspaper, or, much easier to use, large pieces of cardboard. Be sure to overlap the edges by about 6 inches, to block out light. That is KEY! Newspaper needs to be about ¼ - ½ of an inch thick. Weeds can push through otherwise. Wet each layer thoroughly as you lay it out. Hopefully, you saved some rainwater from the last rain event.
  • Sprinkle another thin layer of the nitrogen source over the “sheet” layer.
  • On top of this, add 8-12 inches of a bulk mulch material, like finely ground tree trimmings, leaves, (abundantly available this time of the year) or even old straw bales. Be careful NOT to use old bales of Bermuda grass hay. It can have seeds in it and we don’t want to go “there”!
  •  Wet this layer down well. It will encourage rotting of any weed seeds that may be present and help material to break down faster. The consistency of a wrung out sponge is what you’re looking for.
  • Now, add a layer, about 2 inches thick, of compost. Homemade is the best, but if you’re just starting out, you may need to buy some. Give me a call and I can order it bulk for you and have it delivered to your house. I have a favorite source I’ve used on and off for many years back when I was doing landscapes and had a more active garden center. They test their compost regularly and it’s safe for use in a vegetable garden.
    • (Before you partake in any “free” compost, ask questions.
      • What is their source of raw materials?
      • Do they test it for herbicides? (You don’t want to apply some kind of herbicide ridden compost to your new garden. Not only would it defeat the organic component, but if it’s got a broad leaf weed killer present, you’ll also damage your desired plants’ growth.)
  • If the compost isn’t moist, wet it down.
  • Top off with a nice clean, weed free layer of shredded mulch. I like to get free mulch from local tree trimmers. You can also use a thick layer of leaves, however when they dry, they tend to blow around. Mulch’s job is not only to provide a nice, finished look, but to help reduce erosion. 
Note; You may choose to edge your garden plot with metal edging, some decorative bricks, non-treated lumber, or, just give it about a 12" mulched border between any remaining grass and your first "row". That way, you can keep the weeds and grasses from sneaking over into your garden across the mulch more easily. 

That’s it! You now have a garden in the making. Go back inside, make some hot tea, look at some seed catalogs and dream!

The winter rains will help break down the layers of newspaper or cardboard and all of that yummy organic matter will be creating a wonderful, living layer of topsoil, complete with earthworms and other beneficials, and a growing bed for your new spring garden, while you wait out ol’ man winter.

You actually can plant sooner, if you want to, by slicing open the newspaper/cardboard and setting weather appropriate seeds or transplants over the openings.

Onions are not fans of weeds and this type of weed free garden bed may be a super easy vegetable to start with. “Onion Sets” are available here at Eden’s as well as in most other garden and feed stores. Look for “short day” varieties.

NOTE: I suggest waiting until about mid February as onions are biennials and can be “tricked” into their 2nd growing season by our topsy turvy temperatures. But many people have planted early and get a decent to very nice crop planting at various times. There’s no hard and fast rule with onions and when you’re not planting hundreds of row feed, you can afford to take a few risks. But just a word of caution; if planted too early, some may begin to flower before they finish making a full sized bulb under ground.

If you’re a rookie, you may want to start with transplants this spring for things like tomatoes, peppers and eggplant, which can be a bit tricky starting from seed.
But for squash, melons and other larger seeded veggies; go for it! Direct sow them, according to directions on the seed packets or our spring planting guide (available at the shop), and get ready to watch them come up.

The roots of seeds or transplants will find their way into the nice, rich and weed free plot you’ve created without breaking your back, a shovel, renting a sod cutter or hiring a crew to dig up the grass.


Git Yer Hands in the Dirt & Eat Your Food - Naturally!

Marie 

Sunday, October 5, 2014

Make It Happen - For Compost


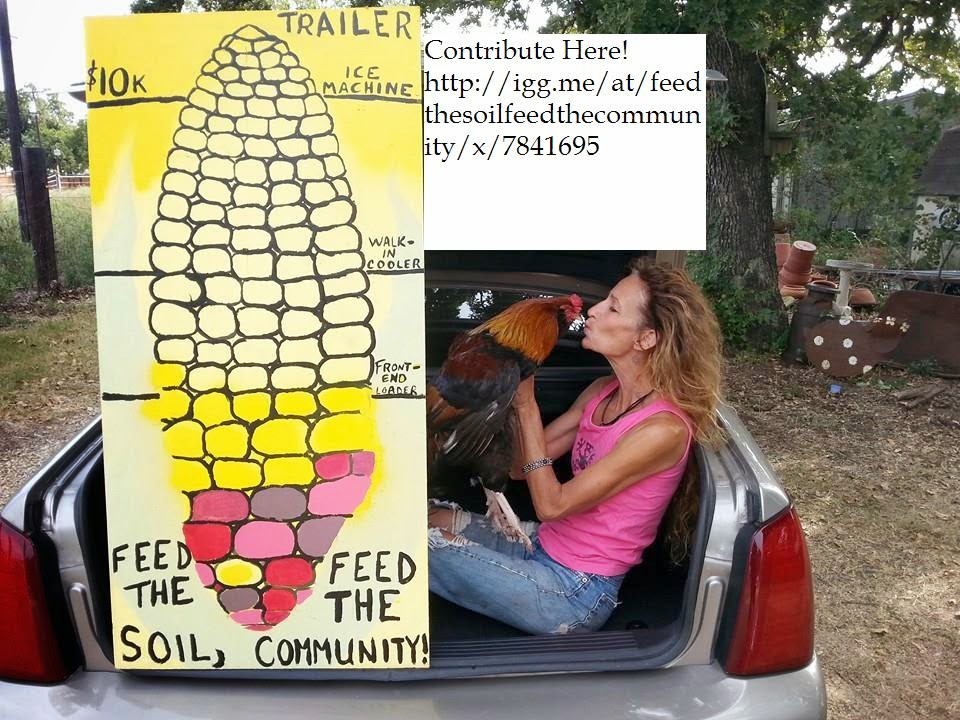
http://igg.me/at/feedthesoilfeedthecommunity/x/7841695
A little over a week ago, I dove head first into unchartered territory and began this farm’s first venture in #crowdfunding by way of Indiegogo, in order to raise a fairly large sum to pay for needed upgrades. It has been, and continues to be, quite exciting – just this week, a long time, very generous farm supporter issued an amazing “challenge” to others watching the campaign. She’s matching dollar for dollar any contribution that comes in, up to $5,000! Yet, running a month-long, on-line fund raiser has also been, and continues to be, a lot of work, with all of the emails, press releases, hash-tagging, and social media blitzing required to get out the word.

But without conventional means of income, it’s pretty tough to walk up to a banker, even my friendly home-town type, and take out a loan for anything - much less an after market front-end loader for a used tractor, a walk-in cooler and an ice machine. That’s pretty much how crowdfunding got started. People needed help pushing their potentially unconventional thoughts & ideas forward, so they turned to other like-minded folks en masse - grande.

And like many small business owners, farmers, it seems, are sometimes in need of this or that. And once we have “it”, we often wonder how in the world we ran a farm before we did. As much as I don’t want to use fossil fuel, (and I use it as infrequently as I can), at this stage in the farm’s development, on a 1-woman farm, it’s a necessary evil. With biodiesel only 15 miles away, at least I’m sort of green when I run the tractor. But I long for the day when ol’ JD only gets fired up to turn compost piles.

And turning compost piles, is the main reason to acquire a front-end loader for the tractor – at least for me. Sure, it’s going to make short of other tasks as well, such as carrying things around here that outweigh me. I’d like to still be able to walk and stand upright when I am 80.

But the ability to make one’s own living, breathing, compost source, could very well be one of the most significant advances for any small farm or homestead. It’s what could afford one to become nearly, totally, self sustaining. And that my friends, is one of the beauties of what organic farming is to me. Not having to trek to the store, or in my case the warehouse, each and every season to stock up on bags of commercially processed organic fertilizer and bottles of liquid this and that, is an important goal to have for truly sustainable agriculture to be realized.

I understand we live in a commercial society where everyone has to make a living, buying and selling things. And there’s always going to be some “stuff” we all buy so becoming “self sufficient” isn’t going to hurt the economy. Heavens, a garden center is one of the most glorious places to visit on Earth! I’ll always find my way to them and opening one was my first venture into owning a small business.

However, when did it become necessary for us to stock up on hundreds, even thousands, of dollars worth of soil amendments to put on our gardens each year in order to grow food? Well, I’ll tell you what I believe....

When we stripped them of topsoil in order to get rid of “weeds” – or worse, we doused them with poisons to do the job. 
When we stopped replenishing our soils with what was already present on the farm – or nearby. 
When we found a "miracle" in a bag, jar or bottle. 
When we got lazy, or too “busy”.

If you’ve ever watched Nature, you know she’s not lazy. Now she doesn’t work really hard either, and yet while she’s always “busy”, she’s busy working smartly. She stacks dead things on top of each other, adds water, leaves it lying there for animals to kick around and poop on, mix up and smoosch all down into the soil, and whalah – compost! 

Now granted, this method takes many years because it’s not heated up just laying there on the forest floor. But pick up a scoop of fresh soil off of the floor in the woods next time you’re hiking – and lift it up to your nose. I think it's one of the most wonderful scents you’ll ever experience. You can’t create that commercially and stick it in a bag.There are laws against it. No, really.

But, you can create it on your farm, or in your backyard, and spread it out over your crops or gardens. And if you can do that, consistently, I submit to you at some point, you’ll make your last necessary trip down the aisle of packaged "miracles" at the local garden store.

The insects will be more in check. Moisture will be less evasive because there’s ample organic matter in the soil to retain it, therefore reducing the need for this precious resource - as we enter our 5th year of drought. Weeds will become less invasive because the soil’s biology will begin to balance out and support higher forms of life, instead of desperately just trying to cover itself with whatever will grow there to keep from eroding away. Namely grass burs, Bermuda grass and fire ants.

Compost. It’s about balance. It’s about permaculture. It’s about working smarter, not harder. And that means working with Nature, not against her. Save that money you'd spend on "miracles", for cool new plants, more seeds, ceramic gnomes and fun baskets to share your bounty with friends. Compost Happens. And it makes your garden grow. Really well.

Thank you to all who have pitched in to help make this farm’s garden grow throughout our 5 years, and in this current on-line crowd funding drive. It better enables me to offer more real, food grown with integrity, to southeast Dallas County’s community where I live. And if you'd like to be part of the crowd - check out our campaign here.

I hope you'll all join us on Nov. 7th here at the farm for a little get together. It's the count down to the end of this campaign, as well as an early Veterans Day tribute with a mini film festival. Terra Firma, and time and weather permitting, Ground Operations will both be DFW area premiered on our big, outdoor, barn screen.


Eat Your Food - Naturally!

Marie